Pro Bar Maker FAQ
Frequently Asked Questions about Pro Bar Maker.
NEW: How can I enable the customer tags filter?
At Pro Bar Maker version 1.10 we introduced a new filter: Customer Tags. With this filter you can show (or not show) a bar to certain users of your e-shop based on their customer tags, or to users who have not logged in (anonymous).
It is easy to define the filter in Pro Bar Maker: Just define it in tab: Filters when you edit or create a bar.
However, the filter will have no effect unless you make a small change to your theme’s liquid code. Here are the instructions.
If you are not confident to make the change yourself, you can ask our support to make the change.
What kind of bars can I create with Pro Bar Maker?
These are the bar types:
- Announcement bar
The simplest of all bars. It just displays a message to your visitors. - Funnel bar (button)
This one has a message and a button that channels visitors where you want to. - Funnel bar (link)
It has a link instead of a button. - Email sign-up bar
Build a mailing list. You can offer a discount or any other kind of incentive to persuade visitors to sign up. - Shipping bar
Offer free shipping to selected countries for orders over certain amount. An effective way to convert leads and up-sell. - Discount bar
Offer a discount for orders over certain amount. Another great way to convert leads and up-sell.
For any kind of bar you can
- select the bar “looks” from a list of predefined templates.
- Then, if you wish, you can change the bar appearance and behavior to your liking.
What are filters?
For each bar, you can define filters to target certain audiences. Using filters you can show a bar
- only if the visitor comes from certain countries.
- only if the visitor came to your e-shop from Facebook, etc. (great for social media campaigns)
- on certain pages of your shop
- from date/time (and/or to date/time)
- only on PC/tablets or mobile phones.
What's the best way to get familiar with the app?
Simple use of Pro Bar Maker should be intuitive. When using the app look for the question mark buttons (?). They provide help about a particular setting.
The Guided Tours inside the app are the easiest way to learn how to use Pro Bar Maker. From the top-right buttons select Help => Features & Guided Tours.
Why don't you offer a free version of Pro Bar Maker?
We use prime servers (Microsoft cloud) for Pro Bar Maker and they don’t come cheap! We want to make sure that our paying customers enjoy excellent performance and, of course, that we don’t lose money.
In the future, when more data about server load and costs are available, we may offer a free plan.
How can I add an emoji to my bar? 👍
An emoji is a visual representation of an emotion, object or symbol. There are hundreds of emojis. Here are a few:
😊 👍🔥❤️🐠🌼🎨⚽🕛
You can find all emojis at emojipedia.
How to add an emoji to the message of your bar:
- Go to emojipedia and find the emoji you want to add. On the emoji page, press the “Copy” button.
- At Pro Bar Maker:
- Position the cursor inside the text box of field “Message”. Position the cursor exactly where you want to insert the emoji.
- Right-click inside the text box and select “Copy”
How can I create a bar with semi-transparent background?
Any bar can have a semi-transparent background color. You can control the level of transparency from “100% transparent” (invisible) to no transparency. You control this from the color palette for the background color of the bar:
- Edit the bar. In tab Looks, select the setting Background Color.
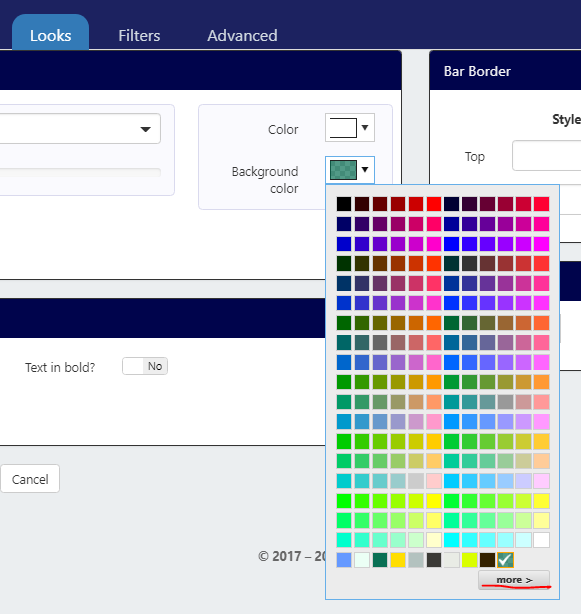
- Click the button “More”
- Drag the slider shown in the image below to control the bar transparency.
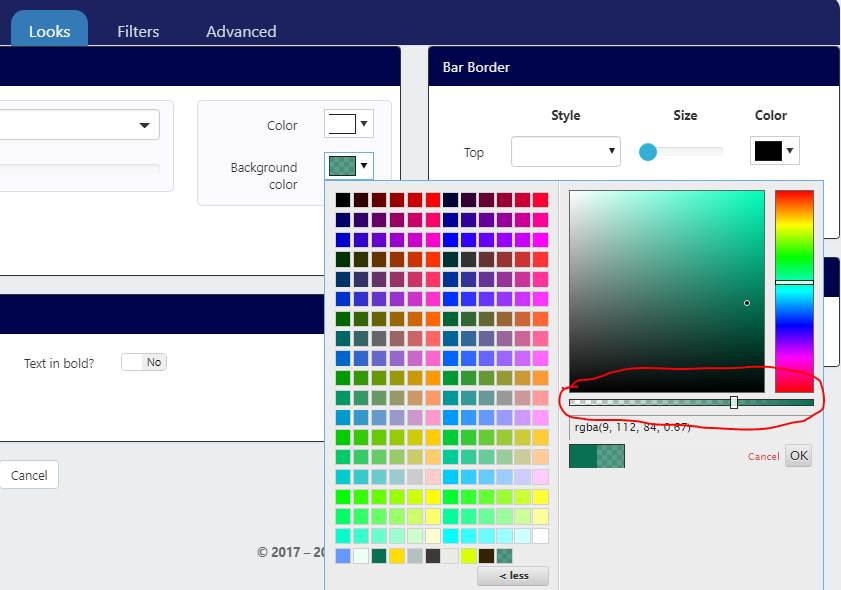
- Press “OK”
When I preview or view my shop, I can see a black "Shopify" bar on top. What is it?
This is the Shopify admin bar. You see it, because you are logged into Shopify admin from the same Web browser.
If it interferes with the preview of a Pro Bar Maker bar placed on top, refresh the page.
If you want to view your Pro Bar Maker bar without the Shopify admin bar: Just open your e-shop from another Web browser or log out from Shopify admin and the black bar will go away.
Let’s see what this bar looks like if we zoom in:

The bar can make the preview of Pro Bar Maker bars placed on top unclear. No problem: Just press the round X button (at the right end of the Shopify admin bar) and the bar will be minimized. You may have to Refresh the page after that.
I use theme "theme name" and top bars overlap with some graphical elements of the theme
Are you sure that the problem is not the Shopify Admin bar (the black bar on top)? Please read the previous question of this FAQ.
Short answer
- First search this FAQ for a solution for your theme.
- If your theme is not in the FAQ (or you have trouble following the solution), please contact Support.
Details
Top bars are drawn “on top” of the rest of the page and push the page content down. This is achieved using a high number for something known as the z-index: Typically, the graphical elements of the theme have z-index zero and the bars a high positive number. So the bars are visible on top of the content.
However, certain themes may use a higher z-index for things like pop-up menus or cart drawers. The result: Part of the pop-up menu, for example, is hidden under the bar.
The solution
The solution may be slightly different for different themes. Just contact us and we will tell you what to do or we ‘ll do it for you. Something that may help is setting the z-index of a bar to a really small positive number (for example 1).
How do I change the z-index of a bar?
The z-index of a bar is a number (0 or higher) that determines whether the bar will be on top of other graphical elements of your page. The higher the z-index, the higher the likelihood that the bar will stay on top of anything else shown on the page.
By default, bars have a really high z-index and they are on top of everything. If you wish, you can specify the z-index of a bar:
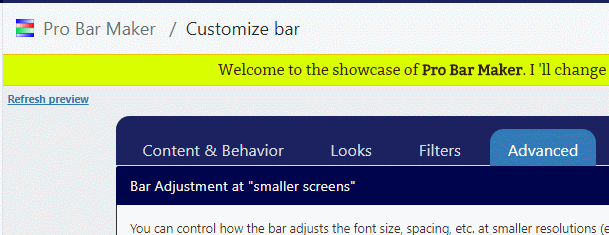
- Create a new bar or edit an existing one. At bar customization screen, select the tab Advanced
- Scroll all the way down until you reach panel System Settings. Click on More to expand it and key-in the desired z-Index (a number like 0, 1 ,2, …)..
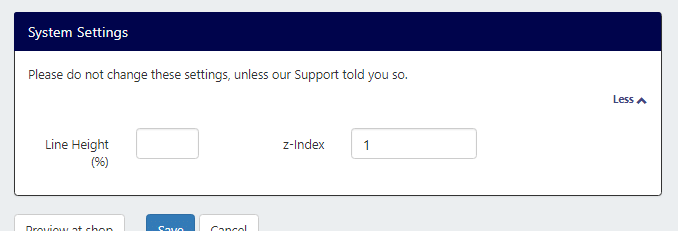
- Don’t forget to Save your bar when you are done with this and any other change you may have.
Theme Brooklyn
Set the z-index of all your bars to 1
Shipping/Discount Bars: How can I change the default currency code for my country?
To change the default currency symbol/code used for your country:
- Edit the Free Shipping or Discount Bar
- In the first Tab (“Content and Behavior“), scroll down and change the option “Show currency symbol/code automatically?” to No. The messages now do not show any currency symbols like $, etc.
- You need to edit the messages manually and add the currency code/symbol yourself. For example change the 1st message of a free shipping bar to “Free shipping for orders over R{{goal}} in South Africa“. Here the user keyed-in the currency symbol R before the goal amount.
A couple of points:
- If there is no space character between R and {{goal}} then , e.g., R100 will appear in the same style and color. Notice the bar preview at the top of the page.
- If you want to use automatic currency conversion to the shopper’s local currency, you cannot change the default currency symbols/codes.
Still need help? Send us a note!
For any other questions, please contact our Support.